Using VirtualBox to springboard VMs to OCI 6 – Let’s All Go to the Cloud
You’re now ready to start moving over the VM we built earlier in this section:
- The first step in exporting your VM to OCI, once the VirtualBox OCI profile is configured, is to click on Export in the VirtualBox main welcome menu.

Figure 13.60 – Export
- You’ll next need to select the VM to be exported to OCI, as shown in the following screenshot – in this case, it’s called small-ol8.8. This will vary depending on what you named your VM.
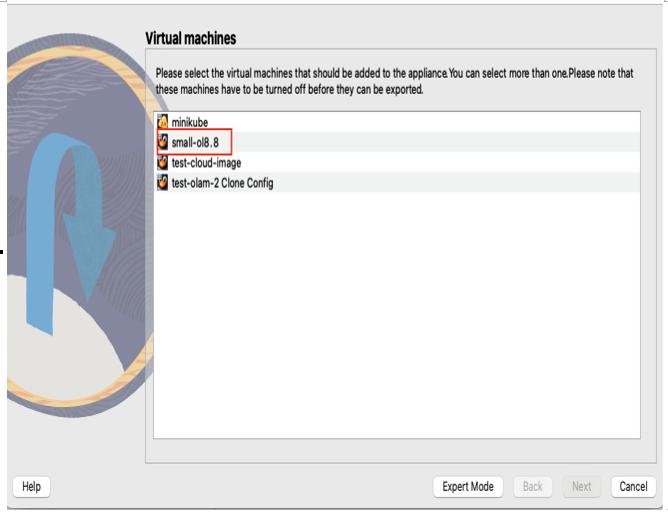
Figure 13.61 – Image selection
- After you choose your VM, you must configure the format in which to export the VM. We’re going to expand the Format dropdown, as shown in the following screenshot. The format being chosen is Oracle Cloud Infrastructure, as we’re migrating this VM to OCI. As a side note, exports aren’t only for OCI. You can export a VM as an OVF to a myriad of platforms, for example, Vmware, OLVM, KVM, HyperV, or AWS. As mentioned at the beginning of this recipe, OVF and OVA both reflect somewhat the same concept: they say, “here’s an exported environment and here’s how to put it back together.” There are, however, some differences between OVF and OVA. OVF can be viewed as a group of files making up an environment, with an attached manifest identifying the files and how they are used. OVA is a single file; consider it a server in a box, an already-built environment ready to be imported. Both can be used outside of OCI, but in this case, we’re going to concentrate on an OCI export using .ova as the file extension.
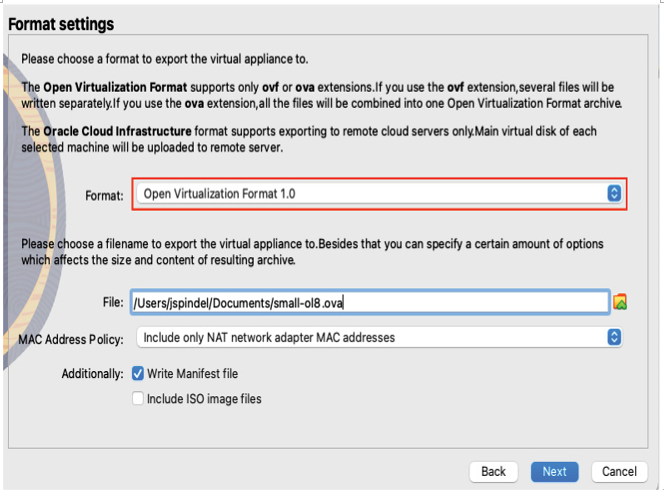
Figure 13.62 – Image format configuration
- As shown previously, choose Oracle Cloud Infrastructure for the format and OCI as the VirtualBox profile, as highlighted in red in the following screenshot.
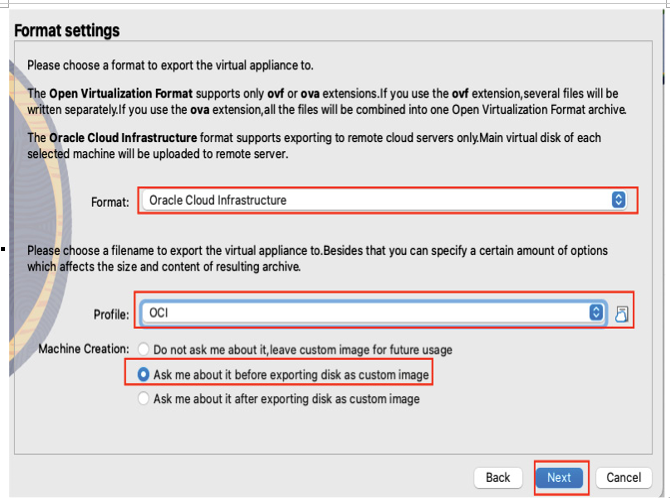
Figure 13.63 – Profile
- You’ll want to make sure all your variables are correct, as shown in the following screenshot, as well as confirming you have an available storage bucket:
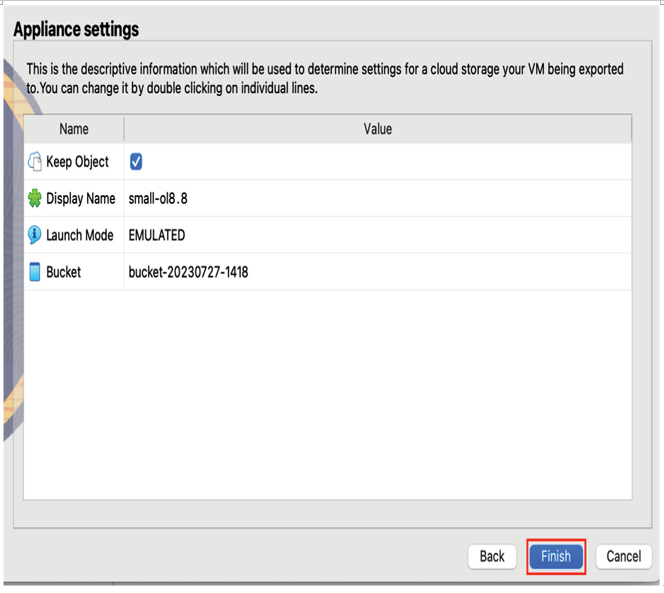
Figure 13.64 – Image output
- You’ll want to expand the Shape section and choose another shape, as VM.Optimized.Flex will not be recognized by OCI. I identified a usable shape, as shown in the following figure, that is available and lightweight. Follow the following image for shape selection:

Figure 13.65 – Shape selection
- As shown previously, expanding this section will give you several shape choices. As a note, a shape is a predetermined size, reflecting a set number of resources. In this case, we’re choosing VM.Standard.E2.1:
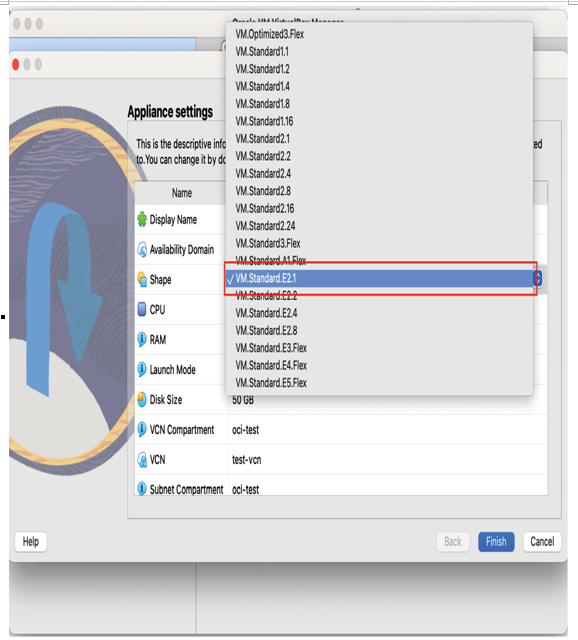
Figure 13.66 – Image shape
NOTE
VM.Optimized3.Flex is not a recognized shape and will not import. You can always change the shape after the VM is deployed.
- Once you’ve chosen the appropriate shape, finish configuring the export, then click Finish to execute the migration to OCI.
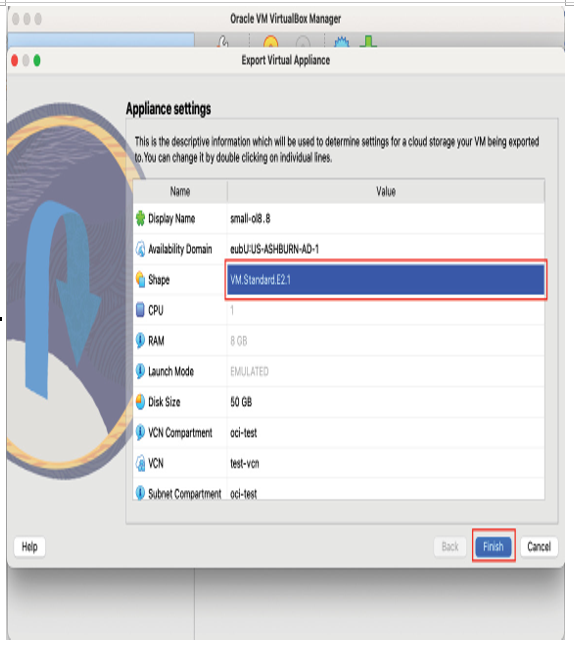
Figure 13.67 – Image shape committed
- Make sure your image shape is identified and the correct shape was selected:

Figure 13.68 – Image writing
- Once the export is completed, you’ll see your VM running in OCI, and you’ll be able to log in to your portal and see that same VM running within your OCI tenancy as well.
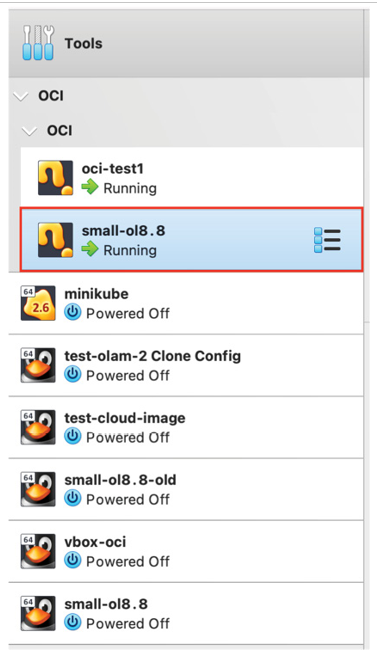
Figure 13.69 – Image running
As shown in the preceding screenshot, the image is now running as a VM in OCI.