
Using VirtualBox to springboard VMs to OCI 4 – Let’s All Go to the Cloud
How to do it…
The following steps walk through uploading the key and configuring VirtualBox to communicate with OCI:
- First, just as with any other CSP, we need to log in to our account.
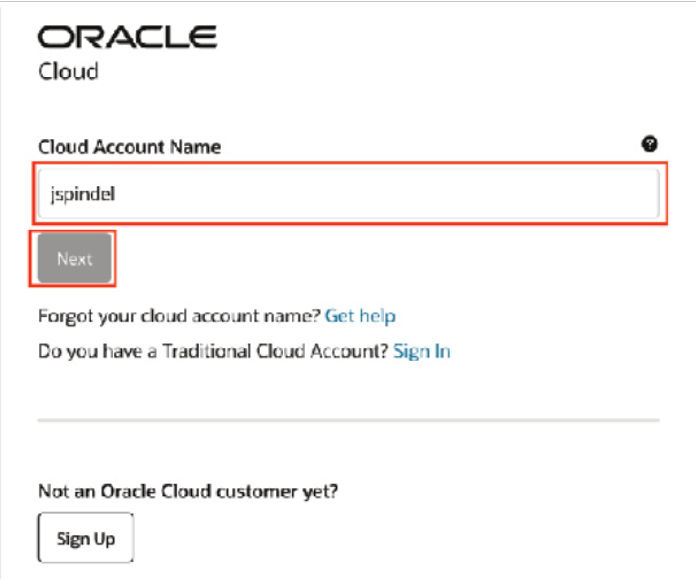
Figure 13.31 – Log in to your account
And this is where we wait for OCI to log us in…

Figure 13.32 – Logging in
- Once you’ve logged in to your account, you’re ready to log in to the tenancy itself. This is where the action begins, and you’ll start to see your efforts pay off. We start by identifying our tenancy and continue from there.
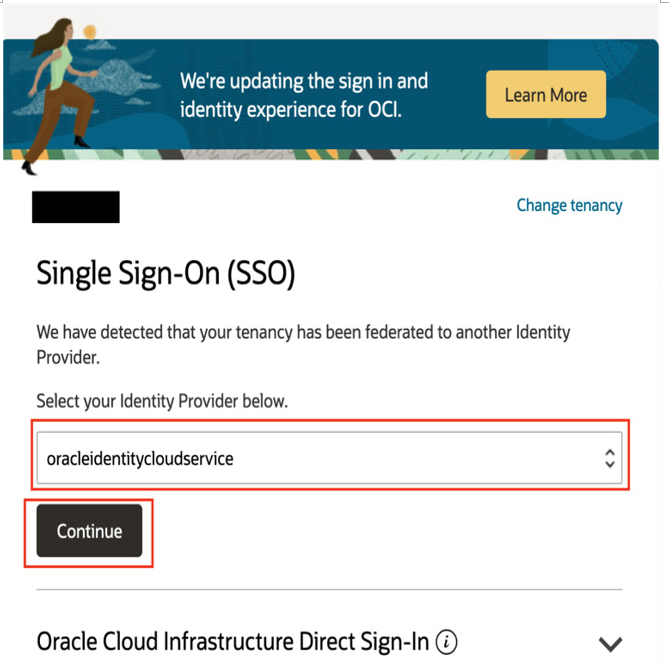
Figure 13.33 – Choose and log in to verify your identity provider
- Once you’re logged in and inside the tenancy, most of the data needed will be in the user settings and is linked to the public key upload. The keys themselves generate a fingerprint, which is the pathway between OCI and VirtualBox.
You’ll see your user icon on the right-hand side of the OCI portal. This will take you into the area with all your account, tenancy, and personal data. This is also where you’ll configure your key access.

Figure 13.34 – OCI profile
Once you expand that menu, you’ll see User settings. This is the access point for all your user access to OCI.
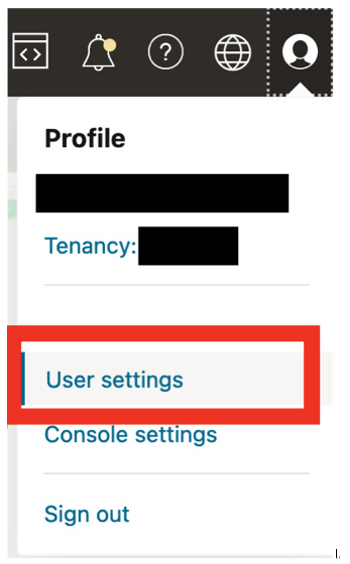
Figure 13.35 – User settings
- The API Keys section will allow you to enter key values for access.
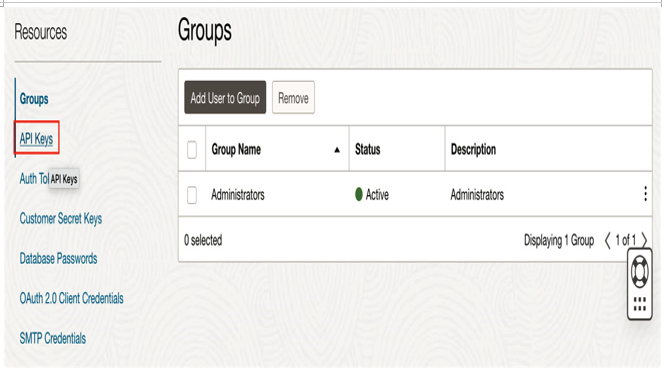
Figure 13.36 – Administrators’ privileges and API keys
- In the following screenshot, you can see all the keys currently uploaded to OCI, reflecting your specific user. If you click Add API Key, this will bring up the options for adding a key.
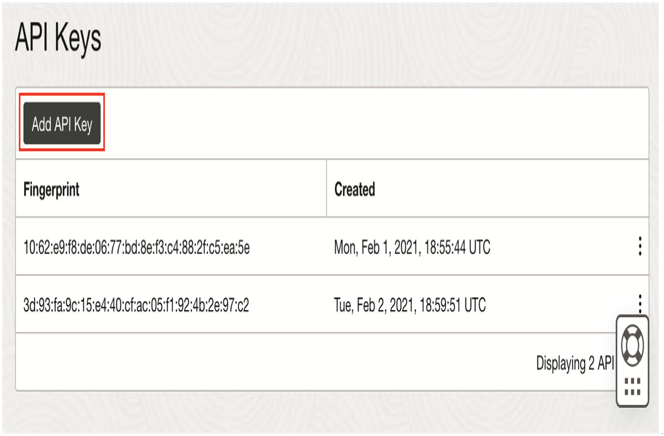
Figure 13.37 – API keys
- Select Choose Public Key File and then select the file from your local environment. Remember we created a public key in the last section. We’re going to select that public key here.
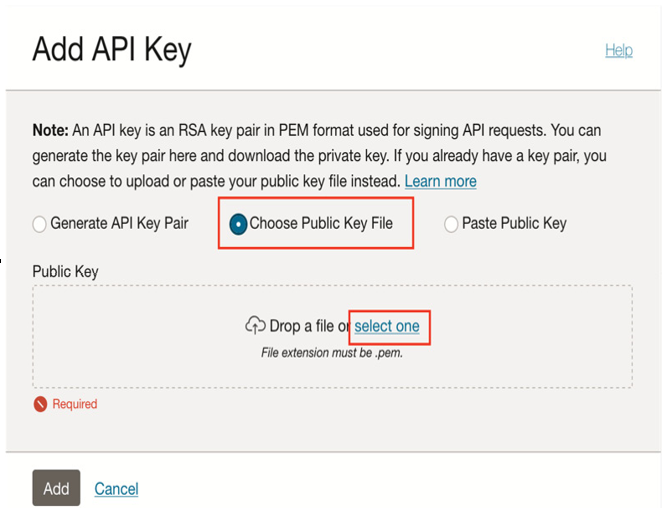
Figure 13.38 – Public key
- Once you’ve chosen the key and it’s uploaded to OCI, you’ll see that key on screen. Click Add:
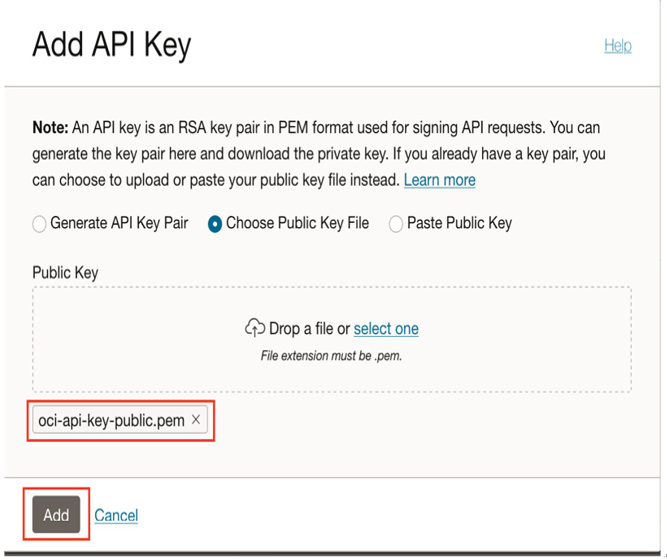
Figure 13.39 – Added key committed
- Now that we’ve got past the key imports, we’ve arrived at a point where we can start to configure access. A configuration screen will appear after you’ve officially added the key. This configuration file is all that you need, aside from a compartment OCID, which we’ll talk about later, to configure the VirtualBox/OCI interface.
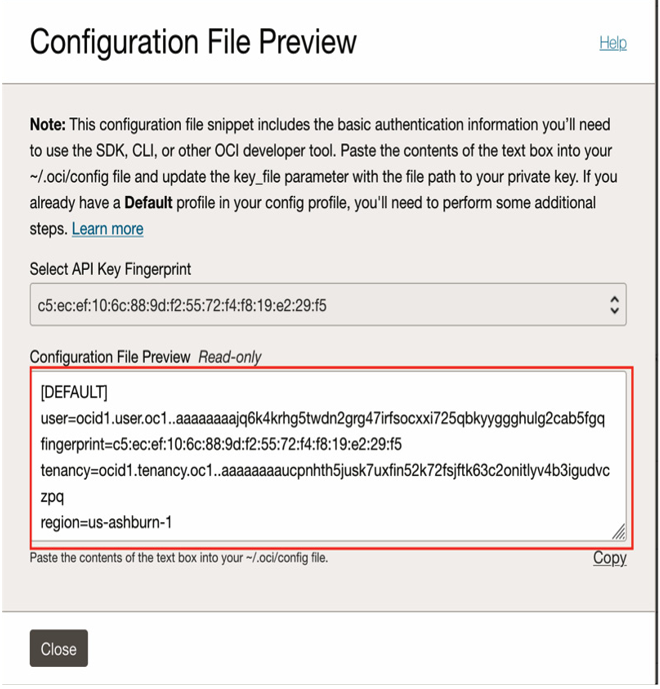
Figure 13.40 – Configuration displayed
Copy the information under Configuration File Preview. You’ll need it to configure VirtualBox to communicate with OCI.
- We’re heading back to VirtualBox now. Near the thumbtack icon will be a menu bar. This menu is the heart of VirtualBox and allows you to alter everything from vdisks, as shown in the following screenshot, to network configurations and, of course, settings relating to the cloud. Expand the Cloud menu item to access the OCI settings:
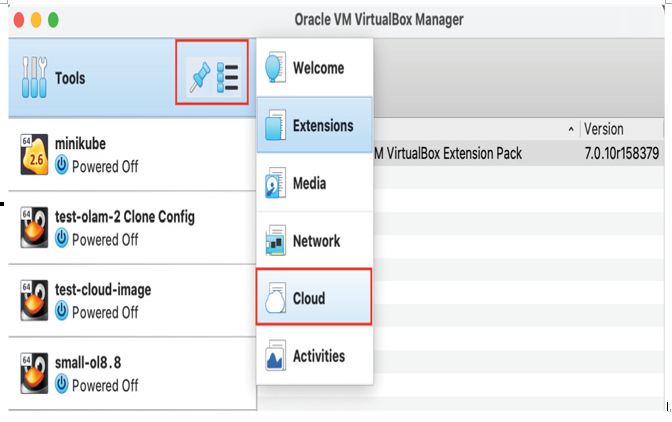
Figure 13.41 – VirtualBox OCI cloud configuration settings
- Once you’ve selected this option, you’ll have to enter a name. I will enter OCI, since we are using OCI.
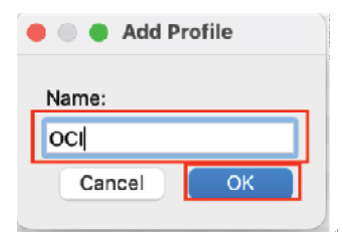
Figure 13.42 – Configuration name