Using VirtualBox to springboard VMs to OCI 3 – Let’s All Go to the Cloud
Going through these configuration changes can be confusing. When it comes down to it, we’re narrowing the differences between OCI-born instances and the instance we’re configuring in this recipe. The GRUB changes are getting the environment ready to operate within the OCI tenancy.
There are a few more steps you’ll have to configure on your host machine for connectivity between VirtualBox and OCI. The way VirtualBox communicates with OCI is through an Application Programming Interface (API). This connectivity requires public and private API keys to be created, and that public key to be uploaded to OCI.
There are several steps in the authentication between VirtualBox and OCI. The following are the components, and their OCID/outputs are what will be needed for connectivity to OCI:
- OCI account:
- Tenancy
- Compartment
- VCN
- Storage bucket
- API keys
- VirtualBox – make sure to create and capture the required keys, as shown after this list:
- API keys
- Host OS (your computer) – make sure to create and capture the required keys, as detailed after this list:
- API keys
Private and public keys are the gateway components to sharing information from one environment with another. A public key can be shared and is used as an encryption method to keep a packet. The private key is kept local, is not shared beyond that user, and is used to decrypt the packet. When placed together, the private and public keys create a lockbox, keeping the packets flowing between two systems secret while in transit. openssl is used to generate the keys, both public and private.
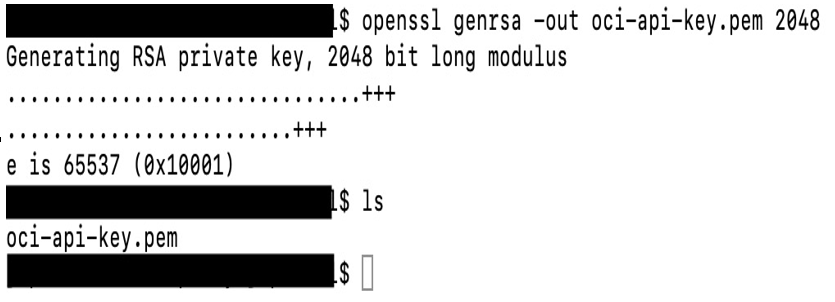
Figure 13.28 – OpenSSL key creation
After creating the preceding key, you need to change the permissions so the key can be used only by you. We’ll use chmod to configure those permissions and allow the key to be used by the user.

Figure 13.29 – OpenSSL key permissions
After creating the private key, we need to create the public key. This is the key you’ll be uploading to OCI so VirtualBox and OCI can communicate with one another. We use the private key to create a public key so the two environments can communicate with one another.
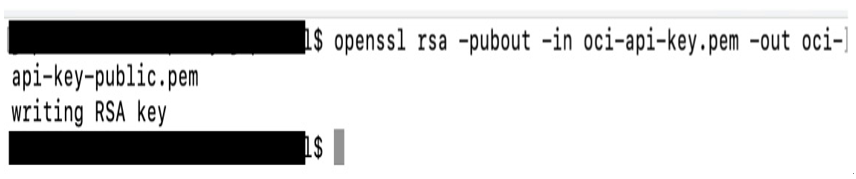
Figure 13.30 – Public key creation
The next steps are to collect the required data from your OCI cloud account to enter the VirtualBox configuration. The information entered will help VirtualBox integrate, through the OCI API, your OCI tenancy and compartments through your VCN. Imagine this as building a highway between VirtualBox and OCI. The keys, both public and private, are the keys to the kingdom, allowing packets to traverse that highway.