
For everyone else, let’s make custom images for AWS – Let’s All Go to the Cloud
For everyone else, let’s make custom images for AWS
It seems very simple: build an image, export the image, and import the image (wash, rinse, and repeat). The concept isn’t much more complicated than that. However, there are steps to go through, and some of those steps have catches.
You’ll first have to walk through the steps of setting up and configuring the AWS CLI. Much like the OCI CLI, AWS’s CLI is a direct command line executing against the AWS API. After the CLI is installed and configured, we’ll walk through setting up an S3 bucket, configuring that bucket, and changing access to allow upload. The following figure shows the stages and their touchpoints throughout this recipe. The AWS CLI is the common thread in staging and executing, along with the GUI. The storage factors in AWS are managed by access control and authentication, which allow us to create, store, and manipulate stored objects and buckets.
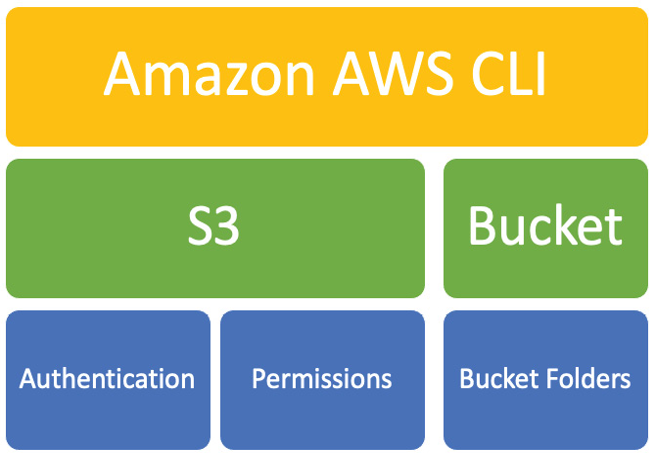
Figure 13.70 – AWS CLI storage connections
Getting ready
Before we can start using the CLI, we must download and install the requisite package. For this recipe, I am using a Mac. You can easily navigate to AWS and download the CLI for Windows or Linux. Regardless, once the CLI is installed, the commands do not differ other than the locations and some other OS-specific changes, which really only apply to Windows:
root# curl “https://awscli.amazonaws.com/AWSCLIV2.pkg” -o “AWSCLIV2.pkg”
After downloading the package, you’ll have to install the CLI. This is done by executing the install package, as shown:
root# installer -pkg ./AWSCLIV2.pkg -target /
In this case, we upgraded the Python version to match what the AWS CLI requires. You can check this by running a which command at the end, which will show the location of the AWS CLI install, and –version, which will list the version of the AWS CLI, as well as Python:
root# which aws
/usr/local/bin/aws
root# aws –version
aws-cli/2.7.28 Python/3.9.11 Darwin/21.6.0 exe/x86_64
After you’ve installed the AWS CLI, we’ll move on to configuring the Oracle Linux OS. We’ll later configure the AWS CLI with the details of our AWS account and data center location:

Figure 13.71 – Create a new VM
You’ll want to fill in all the fields as we did in previous sections. Make sure to name your VM by referencing the disk you created (/Users/USER/Desktop/<NAME>). This will help keep things in place later. You can always go back to the VM in VirtualBox and find the associated media, but it’s easier to name the disk now, while creating the VM.
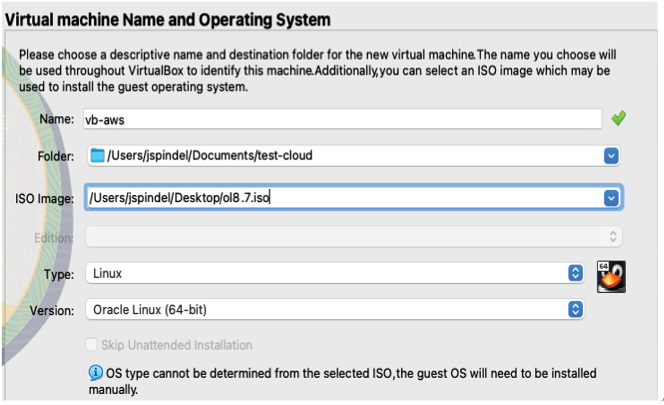
Figure 13.72 – ISO selection